In November of 2019, my Thai wife, Thai Canadian daughter, and I (Canadian citizen) took a trip from Thailand to Canada. We were supposed to be there for six months and come back to Thailand in April 2020.
Unfortunately, the COVID-19 pandemic hit Canada around that time and we weren’t able to return.
A year later, we’re finally back in Thailand. The process of coming back has changed completely – in the past, all we would have needed were airplane tickets. Because of COVID-19, though, the process is now much more complicated and much more expensive.
In this guide, I’ll take you through the process I went through with my family to come back to Thailand in March 2021. Note that things are changing month by month in Thailand, so the process I describe here won’t necessarily be the one you go through, but it should be similar. Always check with your local Thai embassy or consulate for the most up-to-date information.
**Updated: This article was already outdated. There have been many changes since March 2021. Ready our Thailand Pass article for the latest instructions.
"*" indicates required fields
Disclaimer: This article may include links to products or services offered by ExpatDen’s partners, which give us commissions when you click on them. Although this may influence how they appear in the text, we only recommend solutions that we would use in your situation. Read more in our Advertising Disclosure.
Contents
- Summary
- Get a Marriage Visa (Non-Immigrant Type O for Visiting Family)
- Buy Health Insurance
- Get Pre-Approval for Certificates of Entry
- Book Flights
- Book an Alternative State Quarantine Hotel
- Get Certificates of Entry
- Get COVID-19 Tests Within 72 Hours of First Flight
- Get Fit-to-Fly Certificates
- Fly Back to Thailand
- Quarantine for 15 Nights at a Hotel
- Total Cost of Trip
- Timeline for the Entire Process
- Phuket Sandbox
- Now, on to You
Summary
Here’s a summary of the steps we had to take:
- Get a marriage visa for me
- Buy health insurance for me covering COVID-19 in Thailand
- Get pre-approval for certificates of entry (COE) for all of us
- Book flights
- Book an alternative state quarantine (ASQ) hotel for 15 nights
- Get full approval for COEs
- Get COVID-19 tests 72 hours before first flight
- Get Fit-to-Fly certificates 72 hours before first flight and after COVID-19 tests
- Fly back to Thailand
- Quarantine for 15 nights in a hotel, and get two more COVID-19 tests
- Go to Thailand
Get a Marriage Visa (Non-Immigrant Type O for Visiting Family)
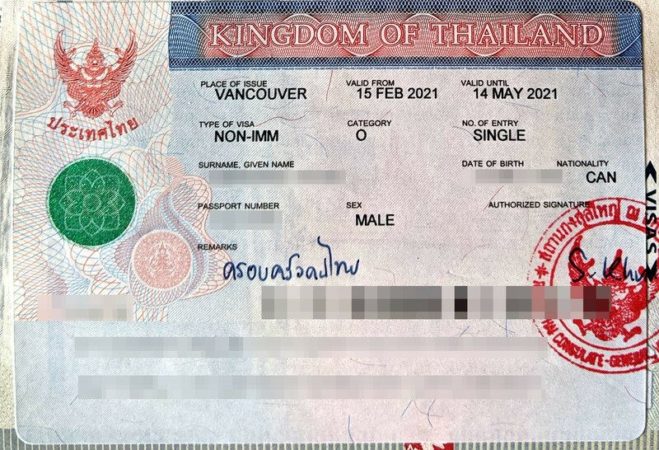
The very first step in the long and annoying process was for me to get a Thai visa. Since my wife is Thai, I decided to get a Marriage Visa.
In Canada, you can get this visa from either the Royal Thai Consulate-General in Vancouver or the Royal Thai Embassy in Ottawa. Since I was closer to Vancouver, that’s where I applied.
Note that mailing your application is the only option as of March 2021 – you can’t do it in person.
Every other time I’ve come to Thailand, I didn’t get a visa beforehand. Canadians can normally stay here for 30 days without a visa. After the 30 days was up I would always go get a visa in Laos, Cambodia, or Malaysia to stay longer.
But during the pandemic, you need to get a visa in your home country before coming here.
I tried emailing the Thai Consulate in Vancouver a bunch of questions before I applied, but they never got back to me.
I then emailed the Thai Embassy in Ottawa, who did reply after a couple days. They said they could only do a single-entry visa there, so that’s what I applied for, even though I applied to Vancouver.
I’m not actually sure if the Consulate in Vancouver is the same or not – for all I know they could do multiple entry visas.
Visa Requirements
I included the following documents in my application (just one copy of each document):
- original passport
- application (note the form is different depending on where you apply – see below)
- one passport photo taken within the last six months
- copy of Thai marriage certificate
- copy of photo page of wife’s passport
- copy of wife’s Thai ID card (front and back)
- copy of wife’s house registration
- copy of Thai daughter’s birth certificate
- money order for CAD$100 (it’s now CAD$130)
- prepaid Xpresspost return envelope to send my passport back to me
As of March 2021, the price for a Non-Immigrant Type O Visa is now CAD$130. I only paid CAD$100 in February 2021, so it’s always best to check with your closest Thai Embassy or Consulate to make sure before applying.
I happened to have English translations of our Thai marriage certificate and our daughter’s Thai birth certificate, so I included both English and Thai copies in my application, but you only technically need a copy of the Thai originals.
However, if you only have English or other language originals, you need notarized copies of them.
The Thai Embassy in Ottawa has links to the requirements for each type of visa.
The requirements should be the same, except that the money order needs to be made out to the “Royal Thai Consulate-General” if you’re applying in Vancouver.
Visa Application Timeline
I sent my application on a Tuesday via Xpresspost and the Consulate received it the following Monday.
They approved it and shipped my passport back to me on Wednesday, two days after they received it.
I got it back the following Monday with my visa inside. So in total it took 13 days to send my application and get my visa.
Buy Health Insurance
When the Thai Consulate sent my passport back with my visa, they also included instructions for what to do next, which was to apply for a Certificate of Entry (COE).
However, while trying to get pre-approved for that, I was rejected because I didn’t upload proof of health insurance.
My wife and daughter didn’t have that requirement since they are Thai, so they were pre-approved within hours.
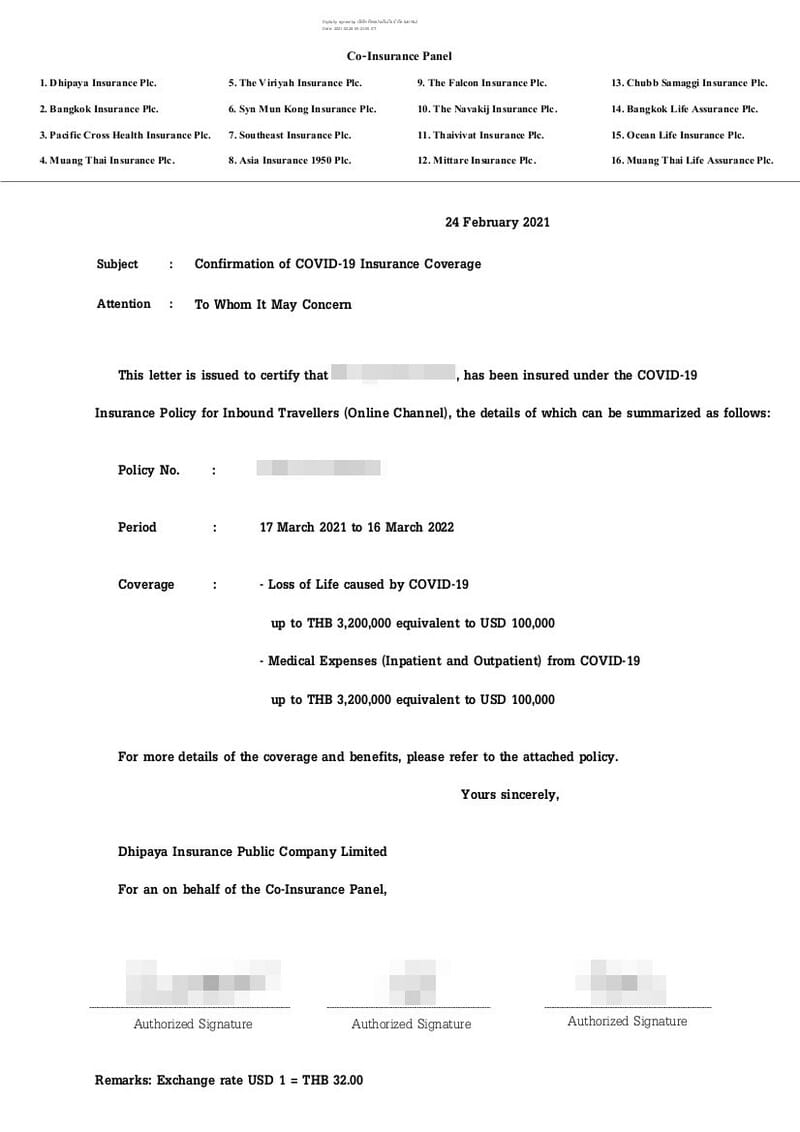
So my next step was to buy health insurance. The document that the Consulate sent me had a link for one place to get health insurance, which is what I used.
It also said that if you intend to stay for an extended period of time, you need at least one year’s worth of insurance, so that’s what I bought.
I also searched for health insurance on my own, but the sites I looked at were even more expensive than the one they recommended.
The price for a year of health insurance was 23,000 baht, which worked out to CAD$999. Quite expensive if you ask me, but what can you do?
Please note that the insurance I bought only comes with COVID-19 coverage. If you want something more extensive, you can check out ACS Globe Traveller.
ACS is slightly more expensive than what I bought but covers other medical expenses as well with a limit of EUR150,000 (5,600,000 baht).
There was one big problem I had when trying to buy health insurance – I didn’t yet know when I would be flying, so I didn’t know what to put for my “Date of Arrival” on the health insurance application.
So before buying insurance, I also had to search for flights to try to figure out when we would leave Canada.
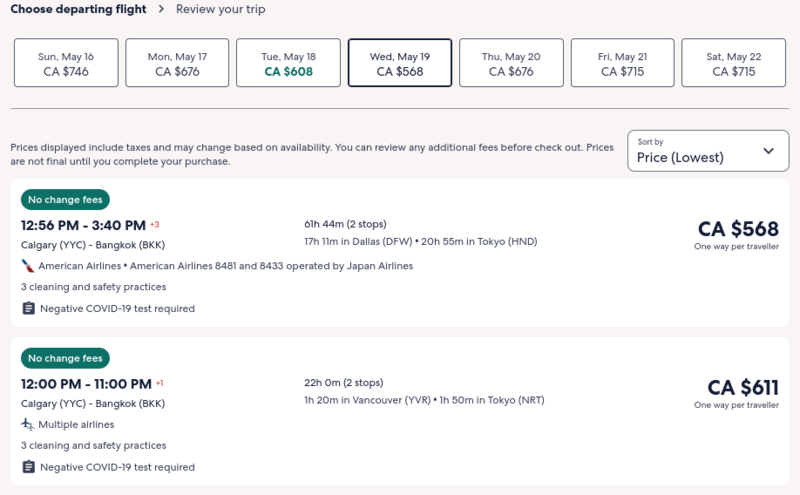
I searched on Expedia and found the best price and fastest travel times were always on Wednesdays (for one-way tickets at least), and since we wanted to come back in mid-March, that gave me a good idea when we would be flying.
I’ll explain more about flights in the Book Flights section below.
After figuring out when we would probably fly, I purchased the health insurance and they sent me a PDF as proof that I could use on my COE application.
Get Pre-Approval for Certificates of Entry
To apply for a COE, you first get pre-approved by giving them all of your information except for the flight tickets and quarantine hotel booking.
Once pre-approved, you can then book your flights and hotel and get fully approved and get the actual COE as a PDF that you can print out.
Each person needs to get a COE, regardless of what nationality they are.
The Thai application is slightly different than the English version. The main difference is that if you’re a non-Thai, you need to upload proof of health insurance – but Thai people don’t.
The site to go to for the COE is coethailand.mfa.go.th.
Both pre-approval and full approval for the COE are very fast – they only took an hour or two to get approved.
Once pre-approved, the next step is to book flights and a hotel to quarantine at, and then upload proof of both of those to your COE application to get full approval.
Book Flights
You have two options for booking flights to Thailand during COVID: repatriation flights and semi-commercial flights, which are just regular flights with specific airlines that have been approved by the Thai government.
Reasons to Choose a Semi-Commercial Flight
There were a few reasons why we thought a semi-commercial flight would be better than a repatriation flight.
We were right about one reason, wrong about another, and uncertain about the other.
Prices
The first reason we chose to fly on a semi-commercial flight was price.
The Thai Embassy in Ottawa said it’s about CAD$1,200 per person for a repatriation flight, but I found semi-commercial flights on Expedia for under CAD$600 CAD per person.
So the tickets being half price were a big reason to choose a semi-commercial.
Note that these were one-way tickets since we intend to be in Thailand for a while.
Airline Credits
The second reason was that we also had airline credits that we thought we could use to pay for our flights.
We got credits when we weren’t able to return to Thailand in April 2020 as originally planned.
The credits were with Air Canada, and repatriation flights went through Cathay Pacific, which meant we couldn’t use our credits for a repatriation flight.
We thought by buying semi-commercial flights we could choose Air Canada and fly back without having to spend any extra money on flights.
That didn’t work out though. We had three flights to come back to Thailand: Calgary to Vancouver, Vancouver to Tokyo, and Tokyo to Bangkok.
In order to use the airline credit, either two of the three flights had to be with Air Canada, or the longest flight (Vancouver to Tokyo) had to be with Air Canada.
And that’s where they get you.
Flights that matched those criteria were about four to five times as expensive as the ones we got, so to use our credits, we would have had to still pay a large amount out of pocket – much more than we actually paid to buy new tickets.
Safety
Our third reason for choosing semi-commercial was that we thought that repatriation flights are mainly for Thai people, and Thai people don’t need negative COVID-19 tests to board repatriation flights.
With semi-commercial flights, we thought there would be more foreigners, who would probably need negative COVID tests to board, theoretically making it less likely someone with COVID was on the plane.
We’re really not sure about this though. There are a lot of variables we couldn’t account for.
For example, we didn’t know how many people were going to be on the repatriation flight. On our semi-commercials flights, I’d estimate they were under half full. Lots of middle seats only had one person in a three to four seat section.
We also didn’t know what people on our semi-commercial flights did between getting their negative tests and boarding the flights.
It’s possible someone could have contracted COVID after their negative test and still been able to board.
Reasons to Choose a Repatriation Flight
The main reason to choose a repatriation flight is if you’re a Thai citizen.
For Thai citizens, they have the option of staying in a State Quarantine hotel for free, but only if they book repatriation flights.
If they fly on semi-commercial flights, they have to stay in an Alternative State Quarantine hotel at their own expense.
Since we wanted to quarantine together, we had to pay for an ASQ hotel ourselves.
In theory, we also could have come back on a repatriation flight and had my wife and daughter quarantine together for free, and only pay for an ASQ hotel for me.
However, after calculating and comparing the prices for A) a cheaper hotel + more expensive flights vs B) cheaper flights + a more expensive hotel, the total cost was roughly the same.
Staying together in an ASQ hotel seemed liked the better option.
If you’re interested in a repatriation flight, you have to check the Thai Embassy/Consulate websites to figure out when you’ll fly and on what airline. There is also a form to fill out to request a repatriation flight.
The links for the repatriation flight schedules keep changing, but they usually have them somewhere on their homepages.
As of mid-April 2021, though, I’m actually having trouble finding anything about repatriation flights on either site.
I did find a Thai-language page about repatriation flights on the Vancouver Consulate’s site, but nothing in English. So it’s best to contact them directly, by phone or email.
If you come on a semi-commercial flight, you have to make sure that the final flight into Thailand is on the Thai government’s approved list of flights.
Book an Alternative State Quarantine Hotel
After booking flights, we then needed a hotel to quarantine at. Coming back in March 2021, we had to quarantine for 15 nights.
As of April, most people only need to quarantine for 10 days now, and if you’ve been vaccinated for COVID-19, only seven days.
As always, these requirements can change at any time, so contact your local Thai embassy or consulate for the most up-to-date information.
The Thai government has a list of hotels that are available to quarantine at, but you have to contact each hotel directly to book your stay.
For Thai citizens who use the State Quarantine option, they don’t get to choose where they stay – they find out after they are already in Thailand.
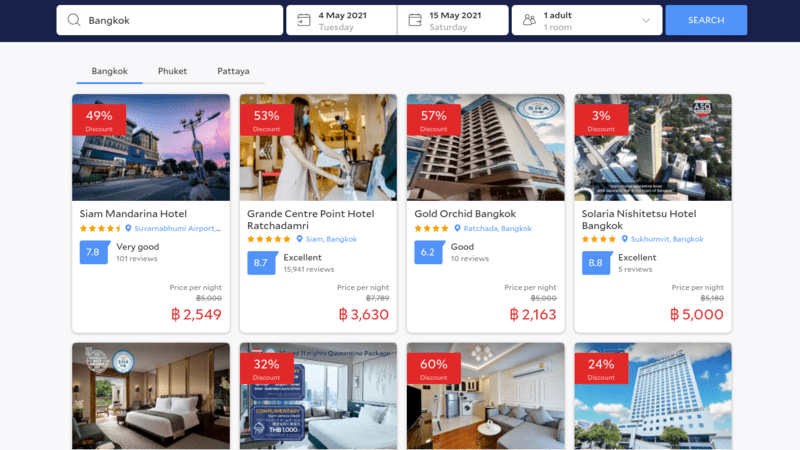
For ASQ hotels, we found the following links on the Thai Embassy in Ottawa’s site to help find a place to quarantine:
Some hotels have LINE accounts that you can use to contact them, and they should all have email addresses and phone numbers too.
My wife contacted a hotel via LINE, literally the cheapest one we could find, and it took three days or so of talking to them to get it booked.
They then sent a PDF via LINE that we could use as proof of our booking for the COE application.
With ASQ hotels you have to pay per person rather than per room, since the hotel has to provide three meals per day for each person as well as COVID tests (two tests per person in our case, maybe only one test now with shorter quarantine times).
So for a family of three, some hotels were extremely expensive at over 100,000 baht or even 200,000 baht.
The cheapest option we could find was 65,300 baht (27,500 baht for me + 18,900 baht for my wife + 18,900 baht for our daughter).
Since we’re not rich, we chose that one. We knew by choosing the cheapest option, our accommodations wouldn’t be that great, but ultimately saving money was more important.
It was only 15 nights after all.
Right now, you are also able to book an alternative state quarantine on agoda.com.
Note that since most people only have to quarantine for 10 days now, prices should go down accordingly.
Get Certificates of Entry
After we had proof of our flights with our itinerary from Expedia and proof of our hotel booking with a PDF from our hotel, we then went back to the COE website and uploaded those two documents to each of our applications.
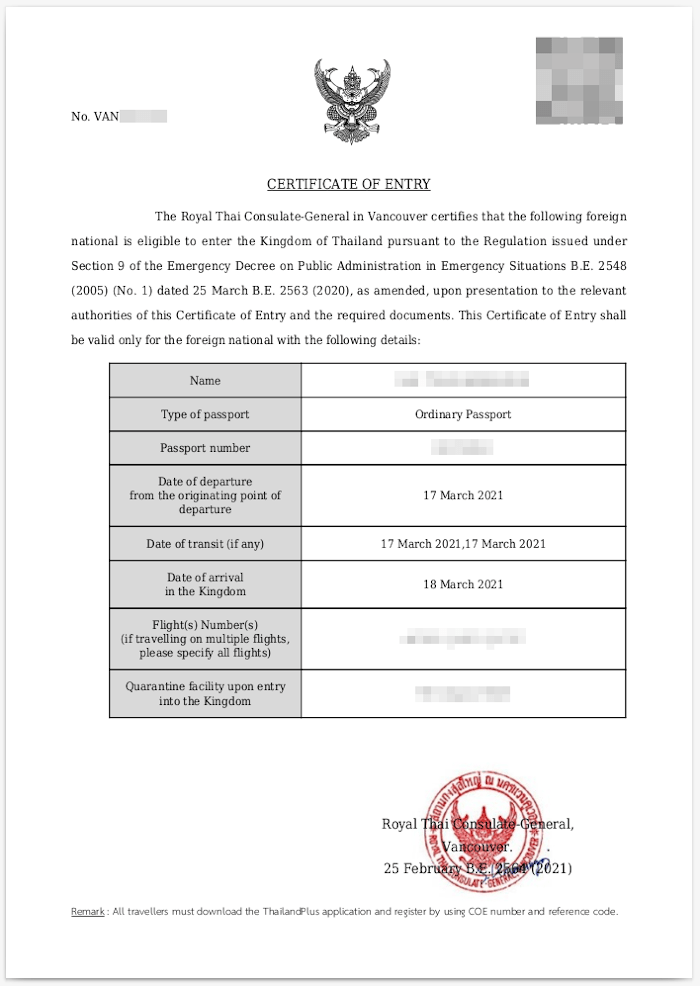
Within an hour, all three of us were fully approved and received emails containing links to our Certificates of Entry that we could then print out.
The COE application was definitely one of the easiest things to do through the process of coming back.
Get COVID-19 Tests Within 72 Hours of First Flight
Foreigners need a negative COVID-19 test in order to board flights to Thailand, and the results of that test have to come back within 72 hours of your first flight.
Just to be completely safe, we also booked tests for my wife and daughter, even though the Thai government doesn’t require it for Thai citizens.
Airlines can have their own rules, and we thought it was better to have the tests and not need them than to need them and not have them.
We booked our tests with Shopper’s Drug Mart, but they only provide tests for Alberta, British Columbia, and Ontario. If you’re in another province, you need to get tested elsewhere.
I’ve had trouble trying to get a full list of places to get tested in each province. The best I’ve found is Air Canada’s site and PrinceOfTravel.com.
For us the price was CAD$150 per person in Alberta. At Shopper’s Drug Mart in B.C. and Ontario, the prices are higher at CAD$199 CAD per person.
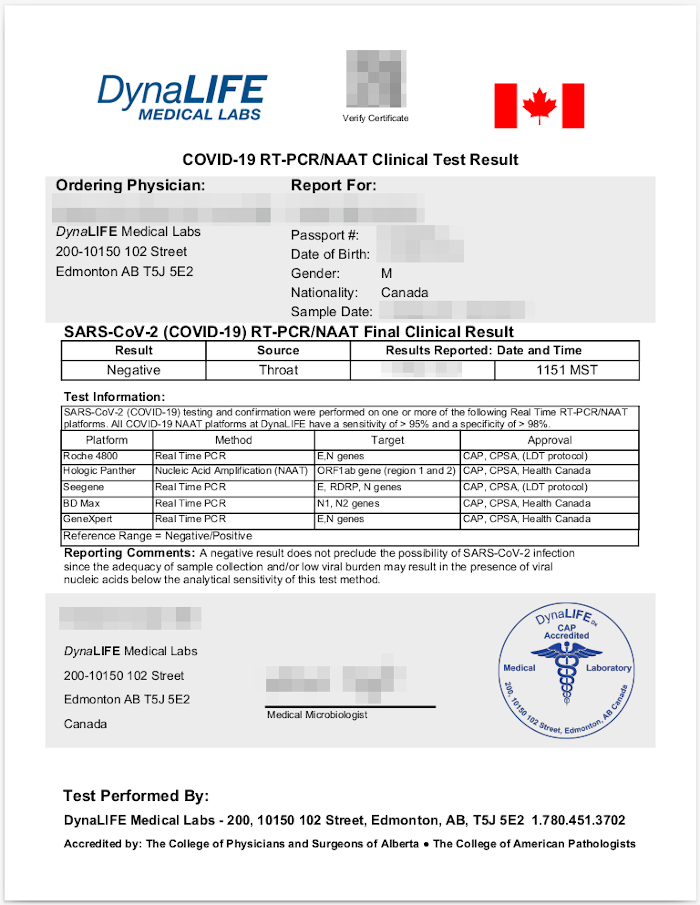
On the Shopper’s Drug Mart site they tell you how to book your appointment. For us, we first had to book our tests through DynaLife, the lab that actually tests the samples for COVID-19.
The form on DynaLife’s site had us fill in what day we were traveling, what day we wanted to get tested (which can only be a three days ahead of travel or sooner), and at what Shopper’s location we wanted to get tested. We also paid for the tests on their site.
After that, DynaLife then sent us an email with a requisition form that needed to be printed out and taken to Shopper’s on the day of our tests.
They also included the phone number for the Shopper’s Drug Mart that we chose, and we had to call them and book our time slot for the day of our tests.
They say that results are typically available within 48 hours but they have no guarantee of that, so we chose time slots 71 hours before our first flight just to be safe.
Fit-to-fly certificates also need to be done within 72 hours of your first flight, and they have to be done after you get your negative COVID tests (you wouldn’t be fit to fly if you were positive), so the earlier you schedule your tests, the better.
We got our results back almost exactly 24 hours after our tests.
DynaLife also gave us a link to check the status of our tests, but the status didn’t change at all until the final results were in, at which point they emailed us anyway, so the link wasn’t really all that useful.
Get Fit-to-Fly Certificates
**As of July 2021, a fit-to-fly certificate is no longer required**
The COVID tests and Fit-to-Fly certificates were the most stressful part of the process because of the timing.
If you mess up and don’t get what you need within 72 hours of your flight, that can completely ruin your plans, wasting a lot of time and money.
We had a hard time finding a doctor to do Fit-to-Fly certificates for us. We didn’t have a family doctor to go to, so my sister tried calling her doctor, but they said they don’t do Fit-to-Fly certificates and to try walk-in clinics instead.
We tried that as well, but the place we contacted wouldn’t do Fit-to-Fly-certificates either.
Searching online for places in Canada didn’t get us anywhere either. We saw one place in Ontario that could do them, and one place in British Columbia, but since we were in Alberta, that wouldn’t work.
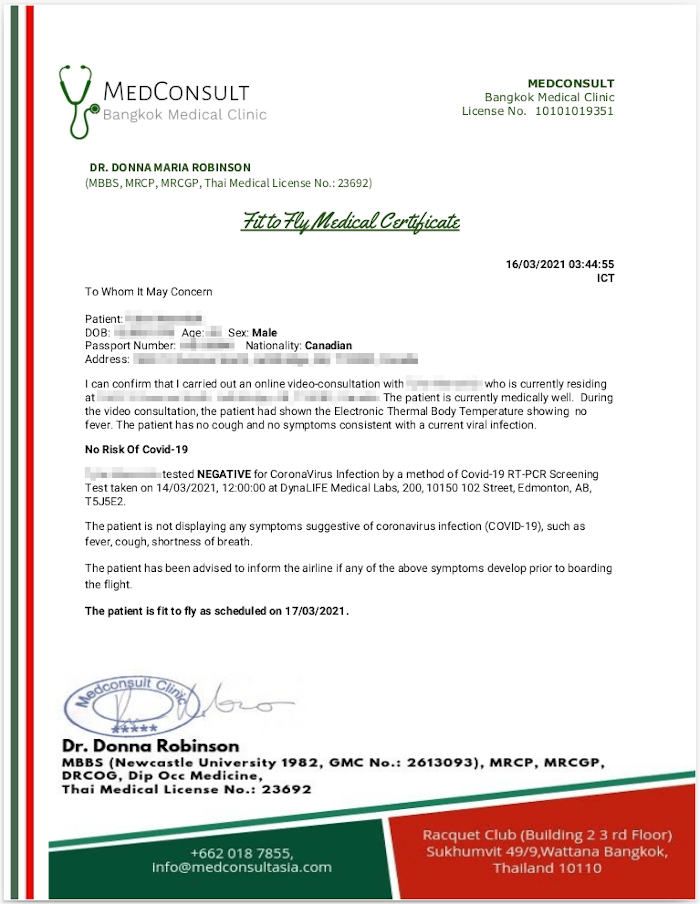
Luckily I happened to also search Reddit, and multiple people commented that an easier way to get fit-to-fly certificates was to use Dr. Donna Robinson at MedConsult Asia.
Even though she is located in Bangkok, you can get a Fit-to-Fly certificate after filling out a form on their site and having a video chat via Skype or Whatsapp.
We contacted them via email first to ask some questions, and they set up everything via email rather than through their online form.
They then sent us a link to a Google form that we each needed to fill out after our negative COVID tests came back. There were two different forms, one for non-Thais and one for Thai citizens.
The whole process was quite easy, and they replied right away to our emails. They also sent our Fit-to-Fly certificates right away which we could then print out to take with us.
Fly Back to Thailand
Aside from packing for the trip back, the most important thing was to make sure we had all of the documentation required for each person, including:
- Passport (with Thai visa for me)
- Flight itinerary
- Hotel booking
- Certificate of Entry
- Negative COVID-19 test results
- Fit-to-Fly certificate
We printed multiple copies of everything just to be safe. At the airport in Thailand, they did keep a copy of our COEs, and we needed another copy when checking in at our hotel.
However, I showed the hotel a copy on my phone which was also okay.
As for the flights themselves, we got to the airport three hours before our first flight.
We had nine total boarding passes (three per person x three flights), but I was only able to print eight of them beforehand, so we had to check in at the Air Canada desk anyway.
The Air Canada people couldn’t give me my remaining boarding pass either – I had to get it from the Japan Airlines desk after our first flight from Calgary to Vancouver.
The reason for this was that Japan Airlines had to check all my documents to make sure I was allowed to board the flight from Vancouver to Tokyo, and then to Bangkok.
So Air Canada checked our documents, then Japan Airlines checked them again, then at the airport in Bangkok they were checked again at least four or five times, and at the hotel once more.
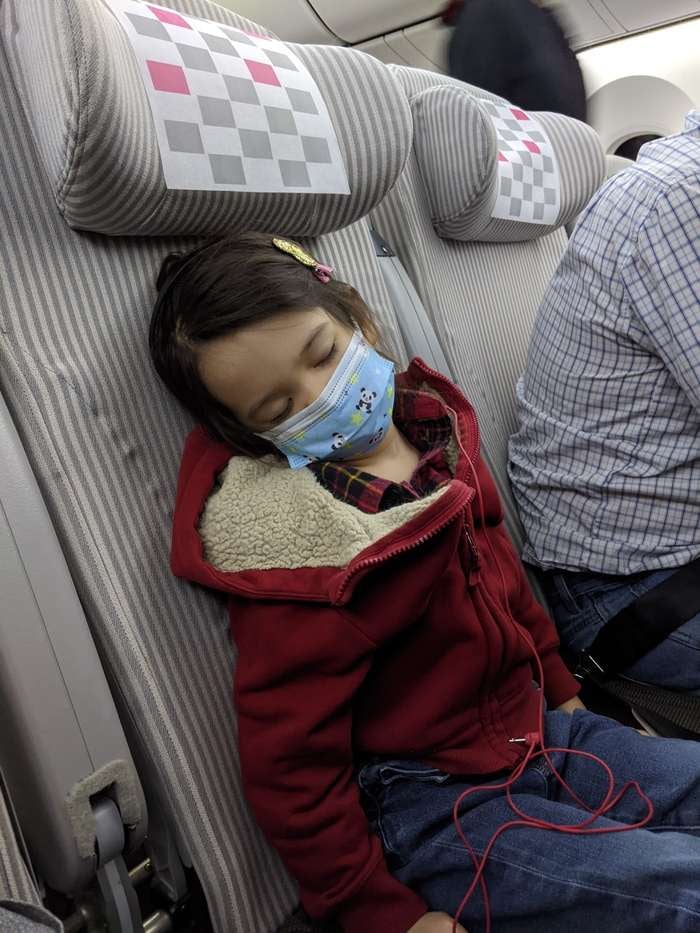
On the planes, you have to wear a mask at all times, except when eating. This only seemed to be enforced by Air Canada though.
With Japan Airlines, we saw people pull their masks down when not eating and the flight attendants didn’t seem to care.
Our total flight time from the first flight out of Calgary to landing in Bangkok was almost a full 24 hours, which was actually the fastest trip we could find.
Others were 30 to 40 hours, which would have been much worse. Even 22.5 hours was excruciatingly slow.
Combined with showing up three hours early to our first flight, the time it took to get through everything at the airport in Bangkok, and then checking in at the hotel, it was probably around 29 hours total.
In the past when I’ve come to Thailand, it was always faster than this.
At the airport in Bangkok, before reaching immigration we first had to wait on some plastic chairs with other passengers for the staff there to come and check our documents.
Once the documents were checked, they eventually called us to the front, took our temperature, and allowed us through to the next point.
Our documents were then checked again. After that, we were allowed to head towards immigration, where my wife and daughter had to go one way, and I had to go another.
There was a third checking of my documents before seeing the immigration officer. I don’t think my wife and Thai had to do that though.
Then on to the immigration officer, where I had to get my picture taken and fingerprints scanned. Once the immigration officer stamped my passport and allowed me through, it was on to pick up our checked luggage.
After getting all of our luggage, we then headed to customs, where nobody checked anything, and then as we were approaching the exit, we had to show our ASQ hotel booking, wait for all passengers going to the same hotel to arrive, and then get in our van to take us to the hotel.
One confusing thing is that you are told early on in the whole process that you need to download and install the ThailandPlus app on your phone to keep track of your location and notify you of COVID cases nearby, but at no point did anyone ever check to see that we had it installed.
The app wouldn’t even run on my wife’s phone. So it basically wasn’t needed at all.
Quarantine for 15 Nights at a Hotel
At the hotel, the check-in process involved another temperature check as well as having our documents checked again.
Every ASQ hotel has nurses stay there from a hospital that is partnered with the hotel. We were able to talk to the nurses via LINE to request medicine and to talk to a doctor.
We had to take our temperature twice per day, once in the morning and once in the evening.
We were supposed to install the COSTE app on our phones to keep track of that, but we were also allowed to just take a picture of the thermometer and send it to the nurse via LINE, which is what we did.
If you check the reviews for the COSTE app, you’ll see it’s not very well-liked and lots of people can’t even get the app to run, which is the same with the ThailandPlus app mentioned earlier.
We also had to get checked for COVID-19 twice while at the hotel, once on day five and once on day 12.
The tests were done via nose swab in Thailand, whereas in Canada it was a throat swab. The throat swab in Canada was fine and the first nose swab in Thailand was also fine, but the second nose swab at the hotel was terrible.
It was super painful and took much longer compared to the first one. So it really seems to depend on the person doing the swabs as to how the bad process is.
Overall it’s still over with quickly (10 to 15 seconds max) and not a huge deal though. At checkout, they give you proof of your negative COVID tests.
Had anyone tested positive for COVID, I’m not entirely sure what the process would have been.
I know that the person who tested positive would have to be taken to the hospital, but I don’t know how it works for a family with a young child.
If just one of the parents tested positive, would the other parent still stay with the child at the hotel? Or would all of us had to go to the hospital? I’m not sure about that.
We had a lot of problems at our hotel:
- We were given a smoking room even though we asked for non-smoking. They said they would move us to a non-smoking room the next day, but we had unpacked so much stuff on the first night that we decided to just stay in the smoking room. I felt like it smelled of smoke a little bit on our first night there, but didn’t notice it after that.
- There were only two sets of everything (towels, bottles of water, toilet paper, etc.), even though there were three of us. They did give us more of most things after a couple days of asking. But we spent the entire stay with only two towels, which was annoying.
- The internet in our room didn’t work so we had to use our neighbor’s wifi instead. Ours was not fixed the entire time we were there.
- The electrical outlets only had two holes and my laptop plug had three prongs, so we had to ask them for an adapter. Unfortunately that caused problems somehow and my laptop charging brick started making popping sounds. So that was the end of using my laptop at the hotel.
- My wife didn’t realize the power here is 220 volts and the hair dryer she brought from Canada was made for 110 volts, so she plugged it in without thinking and broke the hair dryer. That was our fault though, not the hotel’s. They also had another hair dryer for us to use so it wasn’t a big problem.
- After a couple nights of sleeping on their bed my back started killing me, so we had to ask the nurse via Line to get some Tylenol for me to take. Luckily, my back problems went away after taking Tylenol two or three days in a row.
I guess this was what we got for booking the cheapest hotel we could find.
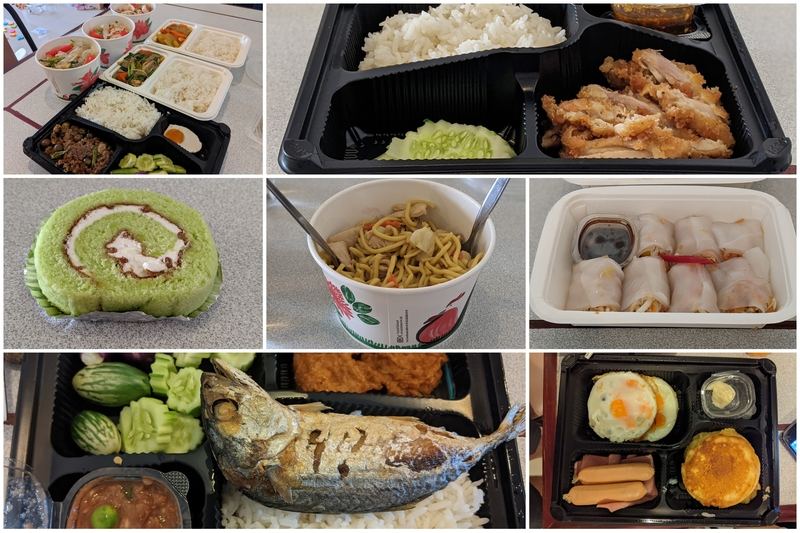
On the plus side, the food was quite good. There weren’t many options for breakfast (just one Thai-style breakfast and one Western-style), but lunch and supper had different choices every day, and almost everything we ordered was good.
Each meal also came with fruit, and it changed daily.
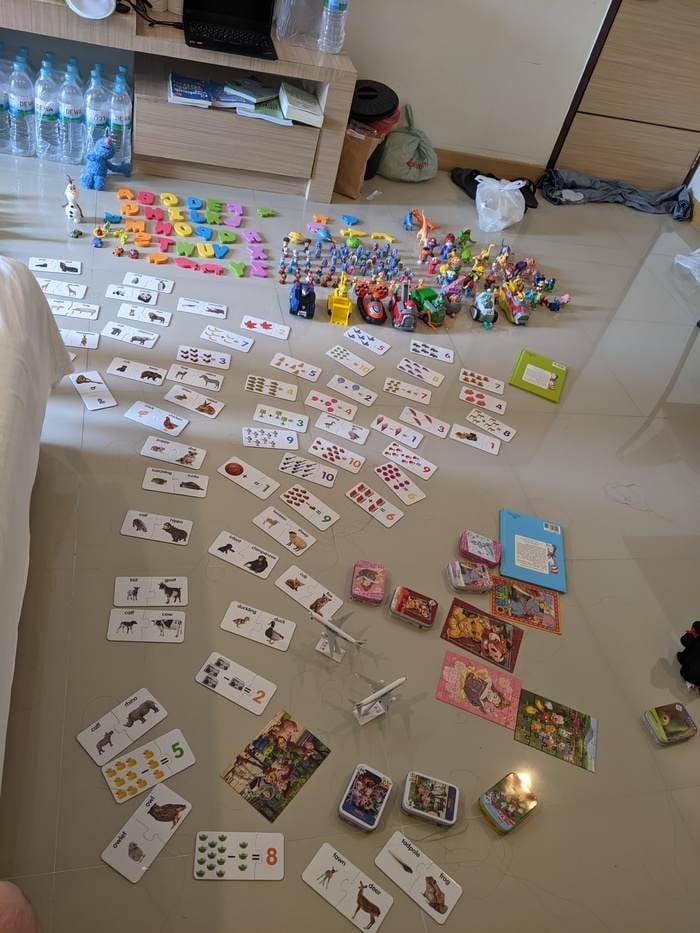
Another plus was that the nurses at the hotel were very nice, and they bought our daughter some coloring books, a toy fishing set, and a large toy airplane as well.
The last thing is that we talked to a doctor once, about our daughter having issues going to the bathroom, and it was supposed to cost 500 baht extra, but they never charged us.
We also ordered fruit smoothies every day for our daughter and we thought we would be charged extra for them as well, but we weren’t.
We asked them about both things specifically when checking out, and they said no, there are no extra charges. So that was nice of them.
Total Cost of Trip
The following chart shows the total cost of our trip. Some things were paid in Thai baht, others in Canadian dollars.
I’ve used an exchange rate of 24 baht per $CAD1, but the rate fluctuates daily so it’s not entirely accurate now. Amounts in bold are the currency that we paid.
| Item | Thai Baht | Canadian Dollars |
| Single-entry marriage visa | 2,400 | 100 |
| Passport photos | 360 | 15 |
| Visa application shipping | 720 | 30 |
| Health Insurance | 24,000 | 1,000 |
| Three One-way plane tickets | 42,600 | 1,775 |
| Three COVID-19 tests | 10,800 | 450 |
| Three Fit-to-fly certificates | 1,200 | 50 |
| ASQ hotel for 15 nights | 65,300 | 2,720 |
| Total | 147,380 baht | CAD$6,140 |
Timeline for the Entire Process
Here is the timeline for the entire process, from sending my visa application in Canada to getting out of quarantine in Thailand.
| Date | Step |
| February 9, 2021 | Sent visa application to Thai Consulate in Vancouver |
| February 15 | Consulate received visa application |
| February 17 | Consulate shipped passport back with visa |
| February 22 | Received passport with visa |
| February 22 | Applied for COE pre-approval |
| February 23 | Denied COE pre-approval because of no proof of health insurance |
| February 23 | Bought health insurance |
| February 23 | Got COE pre-approval after uploading proof of health insurance |
| February 23 | Booked flights |
| February 23-25 | Booked ASQ hotel |
| February 25 | Got COE after uploading proof of flights and hotel booking |
| February 26 | Booked COVID-19 tests with Shoppers/DynaLife for March 14, three days before first flight |
| February 26 | Booked fit-to-fly certificates with MedConsult Asia for after COVID tests and before first flight |
| March 14 | Got tested for COVID-19 |
| March 15 | Got COVID tests back (around 24 hours after test) |
| March 15 | Got fit-to-fly certificates by filling out online forms from MedConsult Asia |
| March 17 | Flew out of Canada |
| March 18 | Arrived in Thailand, started quarantine |
| March 23 | Got first COVID-19 test at ASQ hotel |
| March 30 | Got second COVID-19 test at ASQ hotel |
| April 2 | Got out of quarantine and went home |
Phuket Sandbox
Thailand just released a new model called the “Phuket Sandbox”. You can now fly to Phuket and enjoy your time there without having to spend your first 14 days in an alternative state quarantine hotel.
However, you can’t travel out of Phuket during your first 14 days. In addition, you need to take a COVID-19 test three times, upon arrival, on the 7th day, and on the 14th day.
Basically, Phuket is your alternative state quarantine in this instance.
The steps to come to the Phuket Sandbox are similar to the steps I had to take. However, you need to be fully vaccinated with the Pfizer, AstraZeneca, Johnson and Johnson, Moderna, Sinopharm, or Sinovac vaccine (for anyone older than 18) at least 14 days before coming to Thailand.
Here’s a list of what you need to do in order to come to Thailand in the Phuket Sandbox.
- Get a Certificate of Entry through https://coethailand.mfa.go.th/
- Book a hotel with the Sha Plus symbol*. You can do it through Agoda.
- Book a direct flight from your home country to Phuket.
- Get COVID insurance during your stay in Thailand with coverage of at least $100,000 USD.
- Get a negative RT-PCR test 72 hours before boarding.
- Get proof of COVID-19 Vaccine.
*Sha Phus symbol literally means that over 70% of hotel staff are vaccinated. Hotels also have COVID-19 safety standards.
The Phuket Sandbox is available to 55 countries with low-to-medium COVID-19 risk. It also comes with a 30-day visa exemption.
If you want to stay in Thailand longer, you can apply for a single-entry tourist visa allowing you to stay in Thailand for 60 days. Or you can come with a non-immigrant visa, Elite Visa, or other long-term visas for Thailand.
You cannot change hotels during the first seven days in Phuket. Upon arrival, you will be directly sent to your hotel and get a RT-PCR test there. Please note that you may need to pay the hotel separately for the test. It costs 2,000 baht to 4,000 baht per test.
Also note that businesses in Phuket may not have fully opened yet. You still need to wear a mask, do social distancing, and wash your hands regularly.
In short, the Phuket Sandbox is another option for those who do not want to stay in an alternative state quarantine or for those who want to fly to Thailand for travel.
In addition to the Phuket Sandbox, Thailand is going to introduce a Samui Sandbox soon with similar conditions as Phuket’s.
Now, on to You
I hope this article has been useful. As I said in the beginning, requirements for coming to Thailand from Canada and other countries are changing and can change at any time, so make sure if you’re serious about coming that you check for the latest details with your local Thai embassy or consulate.
Had my daughter not been starting school here in May of 2021, I would have wanted to put off coming back to Thailand. The procedure was time-consuming, expensive, and stressful.
If you are coming by yourself instead of with a family, the price would be significantly cheaper, and if you can sleep on planes, it might not be too bad, but I would still recommend just waiting until the pandemic gets better around the world and most people have been vaccinated.
As of April 2021, Thailand is in its third wave of COVID-19 and it’s the worst it has ever been (which is still a lot better than in North America, though). They’ve been setting daily records for cases per day, which doesn’t give me much optimism that the Thai government will ease restrictions any time soon.






Great set-out of the Covid-19 procedures for flying to Thailand nowadays. As a Dutch citizen, I now completely got clear how things work out, but I guess I will wait until things get less strict and stressful. Nice to read anyway!
Thank you for all the info. My wife is also Thai and we were wanting to go back, but we will wait until next year. We’ve been married for 48 years now and have lived in the U.S. A lot of her family has died in that time so we are wanting to finish out our lives in Thailand. I would get her home at least every two years if possible. It sounds like a lot of trouble do go right now. Can you send me a rundown on what we will need. Of course things may change again by next year.
You should pretty much need to the things as mentioned in this article. If you plan to come next year, it’s better not to prepare anything at the moment until you are ready to move since things might be significantly changed.